> ## Documentation Index
> Fetch the complete documentation index at: https://docs.bitstudio.ai/llms.txt
> Use this file to discover all available pages before exploring further.
# Edit part of a photo
> Change a background, remove a distraction, or refine an image without restarting your whole shoot.
Use the **Editor** when the photo is close and you can name the change you need. Open **Editor** in the sidebar and upload an image, or open an existing image’s editing action.
## Make a text edit
Select **Freeform Edit**. Describe the change, then say which important details should stay. Choose a model and quality from the control beside **Submit**, review the credit cost, and submit.
```text theme={null}
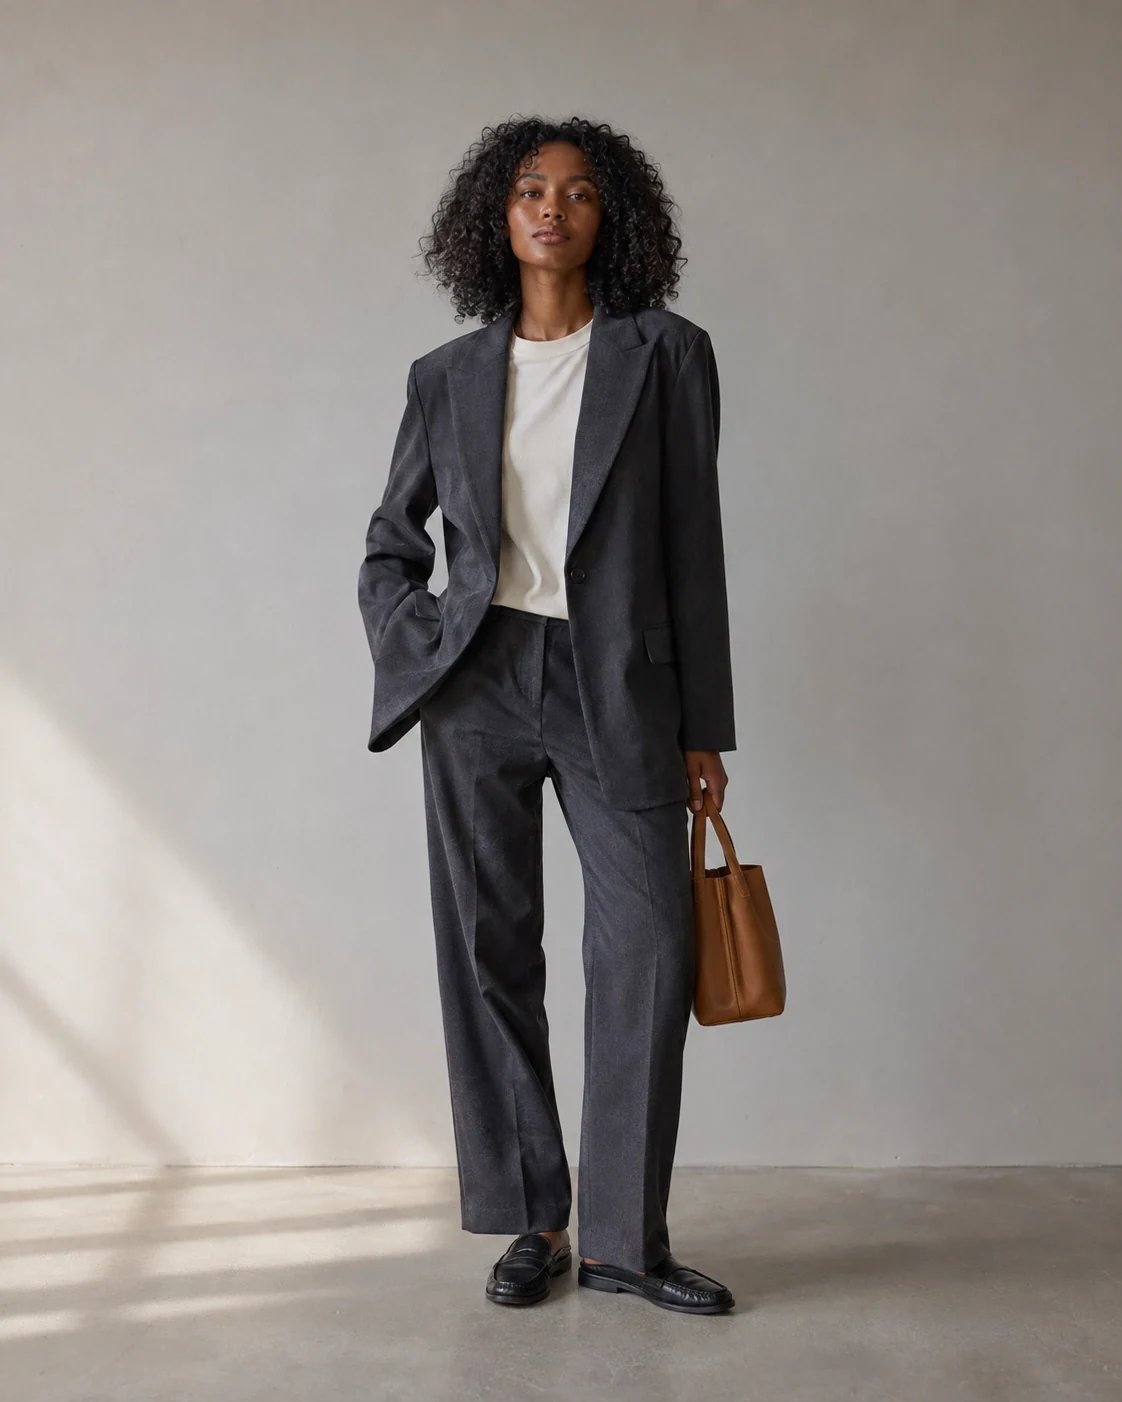
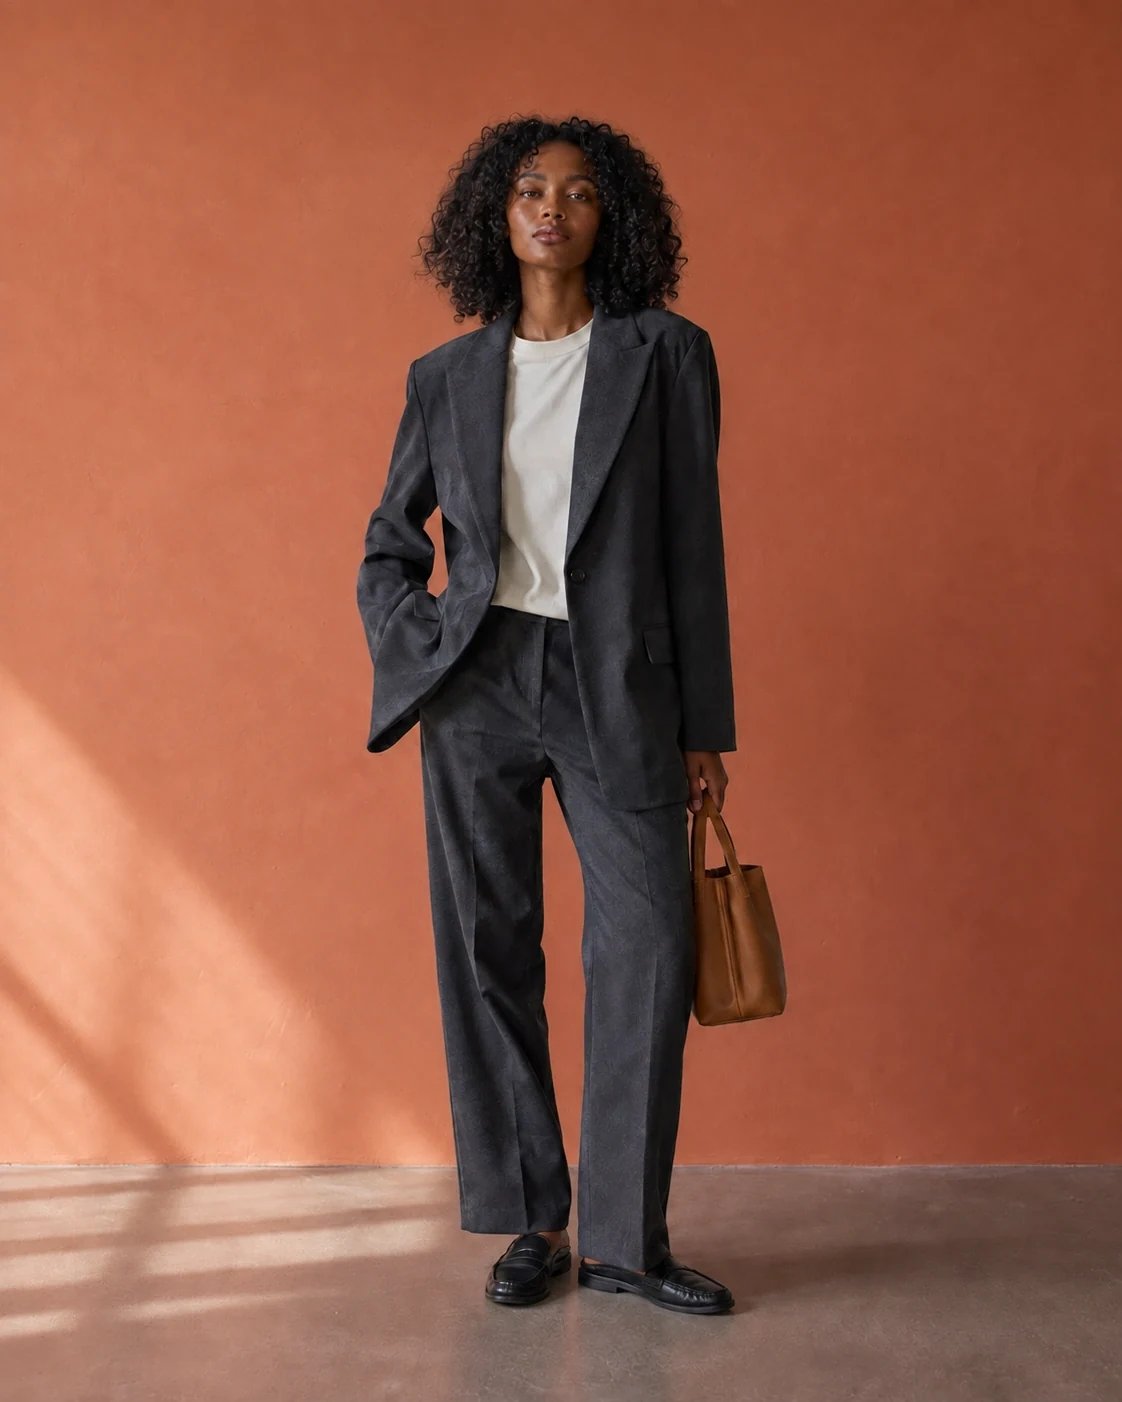
Replace the background with a warm terracotta studio wall.
Keep the person, suit, and pose unchanged.
```
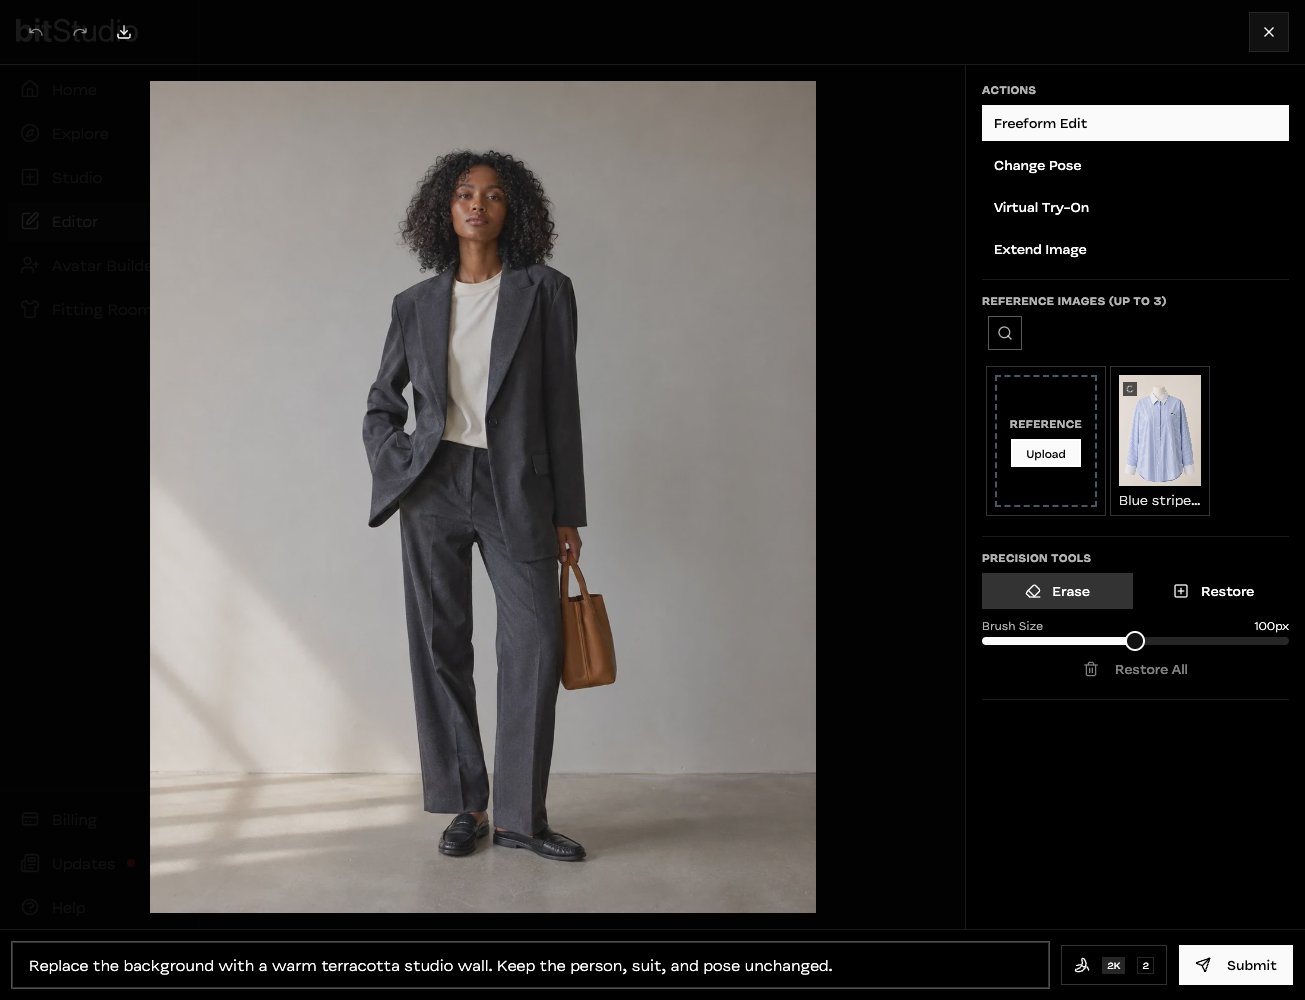 For a visual target, add a **Reference** image. For example, a photo of the desired location can explain the setting more clearly than a long description. Only select references relevant to this edit.
## Target a smaller area
Use **Erase** under **Precision Tools** to mark the area to change. Adjust **Brush Size** for the object; use **Restore** to undo part of the marked area, or **Restore All** to start over.
Describe what should replace the marked region. To remove a handbag, include its handle and shadow in your selection, then ask for the background or clothing that should appear there. A tight selection helps, but leave enough space for natural edges.
## Check the new version
Wait for the new result before making another edit. Compare it with the source at a useful zoom: look at edges, garment seams, logos, fingers, and lighting. Keep the strongest version as the starting point for the next change.
For a visual target, add a **Reference** image. For example, a photo of the desired location can explain the setting more clearly than a long description. Only select references relevant to this edit.
## Target a smaller area
Use **Erase** under **Precision Tools** to mark the area to change. Adjust **Brush Size** for the object; use **Restore** to undo part of the marked area, or **Restore All** to start over.
Describe what should replace the marked region. To remove a handbag, include its handle and shadow in your selection, then ask for the background or clothing that should appear there. A tight selection helps, but leave enough space for natural edges.
## Check the new version
Wait for the new result before making another edit. Compare it with the source at a useful zoom: look at edges, garment seams, logos, fingers, and lighting. Keep the strongest version as the starting point for the next change.
 Need a different garment, stance, or crop? Use [Virtual Try On](/guides/virtual-try-on), [Change Pose](/features/pose-and-face), or [Extend Image](/features/extend-and-upscale).