> ## Documentation Index
> Fetch the complete documentation index at: https://docs.bitstudio.ai/llms.txt
> Use this file to discover all available pages before exploring further.
# Try an outfit on a person
> Use a person photo and garment references to create a virtual try-on in Studio.
**Virtual Try On** starts with an existing person photo and changes the clothing. Use it when the person, pose, and setting already work for you.
You need a person photo and at least one garment reference. For a full outfit, use separate, clear references for the pieces you want to combine.
## Choose a useful person photo
Use a well-lit image with one person clearly visible. Show the body area where the new garment will go. A full-length photo is useful for trousers and dresses; a waist-up photo can work for a top.
Keep hands, bags, and hair from covering the garment area where possible. A difficult pose or heavy occlusion gives the model less information to work with.
Open **Studio → Virtual Try On**. Upload the person photo or select a saved image using the person picker.
Upload a garment or select it from your wardrobe. Use one wardrobe item per actual garment; put multiple views of that garment inside the item.
To build a look, select compatible items such as a top and trousers. The selection limit is shown in the interface and depends on the model.
Choose an available try-on model and quality option. Review the cost. For your first attempt, keep additional instructions short or leave them empty.
Start the try-on. When it finishes, compare the face, pose, garment shape, pattern, and uncovered body areas with your inputs.
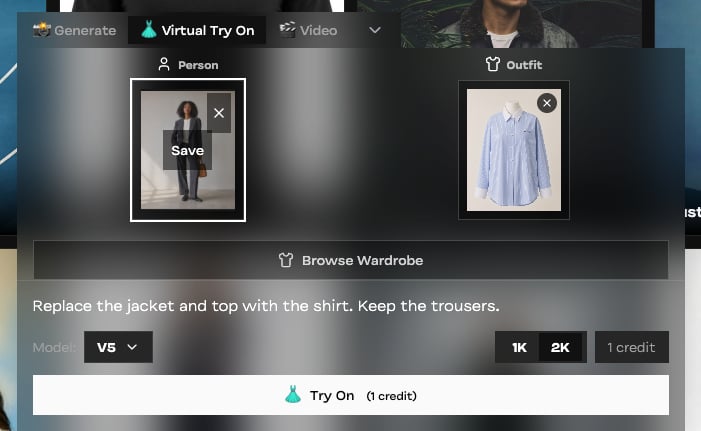 ## Give instructions only when they help
```text theme={null}
Wear the shirt untucked. Keep the sleeves down and the collar open.
```
Avoid describing a new face, body, pose, or setting if your goal is to preserve the starting photo. Use [Generate](/guides/product-photos) when you want to direct all of those at once.
## Common adjustments
| Problem | First adjustment |
| ---------------------------------- | ---------------------------------------------------------------------------- |
| Part of the new garment is missing | Use a person photo that shows that area of the body. |
| The wrong garment view appears | Add a matching front or back view to your wardrobe item. |
| Two garments blend together | Test each garment on its own, then combine the compatible pieces. |
| Identity or pose drifts | Use a clearer person photo with less occlusion and fewer extra instructions. |
Try-on is an AI visualization. It does not measure the person or establish the correct physical size or fit.
[Prepare better person and garment references →](/tips/source-photos)
## Give instructions only when they help
```text theme={null}
Wear the shirt untucked. Keep the sleeves down and the collar open.
```
Avoid describing a new face, body, pose, or setting if your goal is to preserve the starting photo. Use [Generate](/guides/product-photos) when you want to direct all of those at once.
## Common adjustments
| Problem | First adjustment |
| ---------------------------------- | ---------------------------------------------------------------------------- |
| Part of the new garment is missing | Use a person photo that shows that area of the body. |
| The wrong garment view appears | Add a matching front or back view to your wardrobe item. |
| Two garments blend together | Test each garment on its own, then combine the compatible pieces. |
| Identity or pose drifts | Use a clearer person photo with less occlusion and fewer extra instructions. |
Try-on is an AI visualization. It does not measure the person or establish the correct physical size or fit.
[Prepare better person and garment references →](/tips/source-photos)