Start with a photo you already like. A finished image gives the video a concrete person, outfit, and setting to work from.
1

Add your start image

Open Studio → Video. Upload the image in Start (optional). For a product clip, use a sharp image with the whole garment visible and some room around the person.
2

Describe movement

Give the subject one action and the camera one movement. Keep the first test short.
3

Choose the clip settings

Set the shot duration, model, and ratio using the options available to your account. Check Audio if you need generated sound. Review the credit total on Generate Video, then submit.
4

Review the entire clip

Watch the beginning, middle, and end. Check the face, hands, garment shape, print, and background for changes before downloading your chosen version.
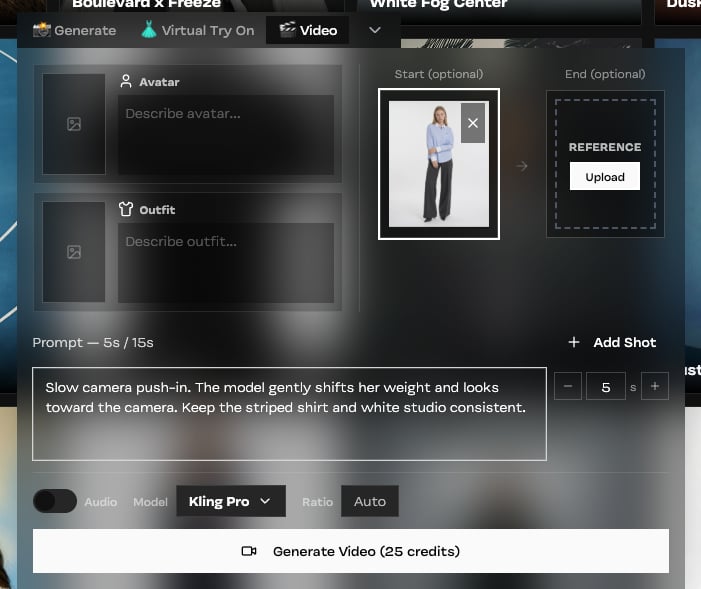
Video panel with a blue-shirt start frame, five-second camera and model movement prompt, and audio turned off

A short motion brief using the published blue-shirt example as the start frame.

Add an end frame or more shots

An End image gives the clip a destination. Use a compatible person, outfit, and composition so the transition is plausible. You need a start frame before adding an end frame. Use Add Shot when you need distinct beats. Give each shot a clear action and duration within the total shown in the panel. Begin with one shot while you establish the look; more shots add more decisions to review.

Start from text

You can leave the start frame empty and describe the scene. This is useful for exploring a concept. For a specific product, an approved start photo is usually a clearer reference than a description alone. If fabric or facial details drift, reduce the amount of motion and try a steadier camera. Fix problems in the source photo with the Editor before animating it.