Source quality sets the ceiling for a useful product image. Start with a photo that clearly shows the thing you want the result to reproduce.

Product references

Use a sharp, evenly lit product photo with the whole item visible. A plain background makes edges easier to understand. Keep color treatment neutral so the reference shows the real fabric.
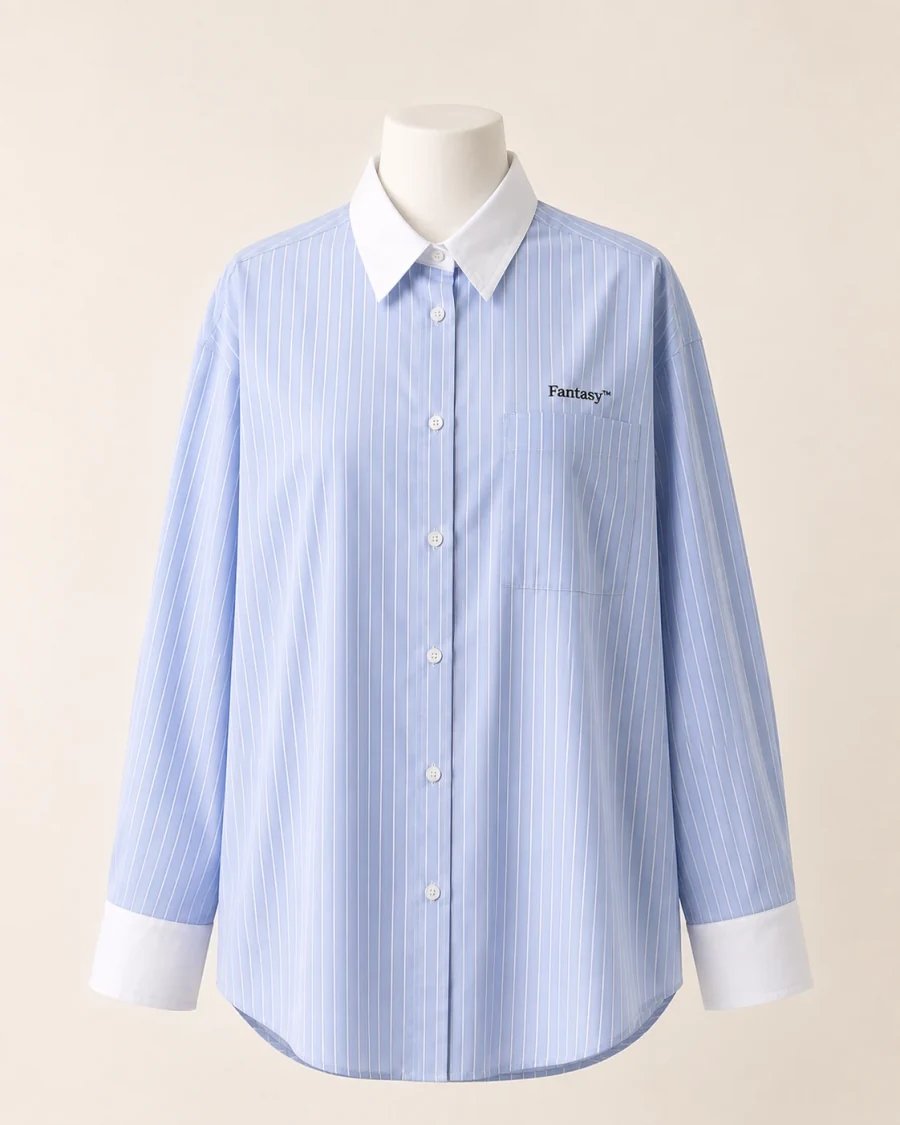
Front product reference of a blue striped shirt with white collar and cuffs

Front: collar, cuffs, buttons, and overall shape
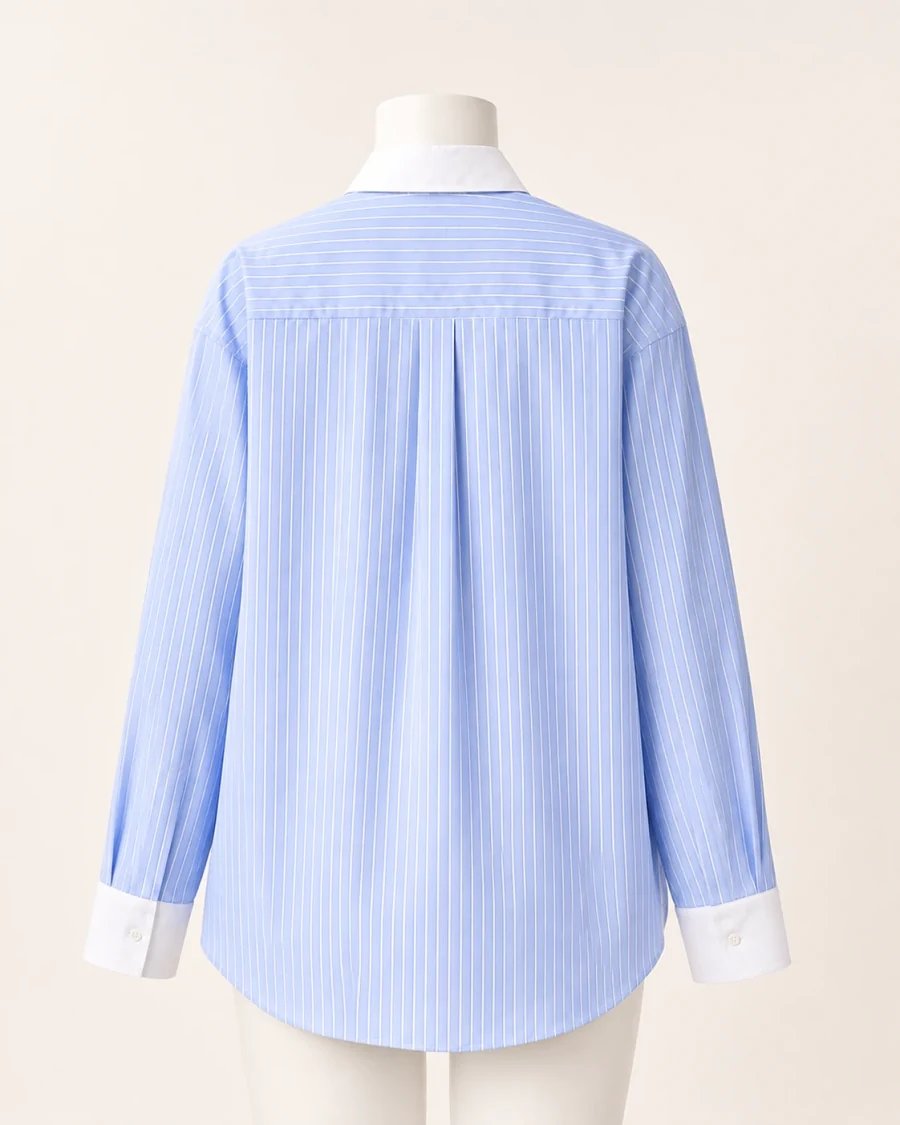
Back product reference of the same blue striped shirt

Back: shoulder yoke and back construction

Add a back view when you need a rear pose. Add a close-up when a logo, fastening, texture, or other small detail matters. Keep each saved wardrobe item to one product and colorway; store a second color as a separate item. Avoid screenshots with shop interfaces, collages, watermarks across the garment, heavy wrinkles that hide the cut, and photos where another object covers important details. More references help only when they add clear, consistent information.

Person references

For Virtual Try On, use a photo with one clearly visible person. A front or slight three-quarter pose with the arms away from the torso makes the clothing area easier to replace. Match the crop to the garment: a portrait cropped at the chest cannot show the hem of a long dress. For an avatar, prioritize a sharp face, natural lighting, and a recognizable appearance. Use photos of the same person across the reference set.

If a detail keeps changing

Check whether that detail is visible in the source at a useful size. If it is not, add a closer reference or use a clearer product photo. A prompt can direct attention to a collar or pattern, but it cannot establish the exact construction of a hidden part. Save a reusable wardrobe item →